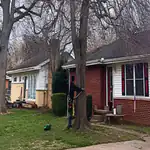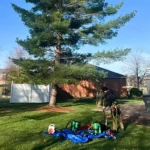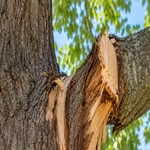
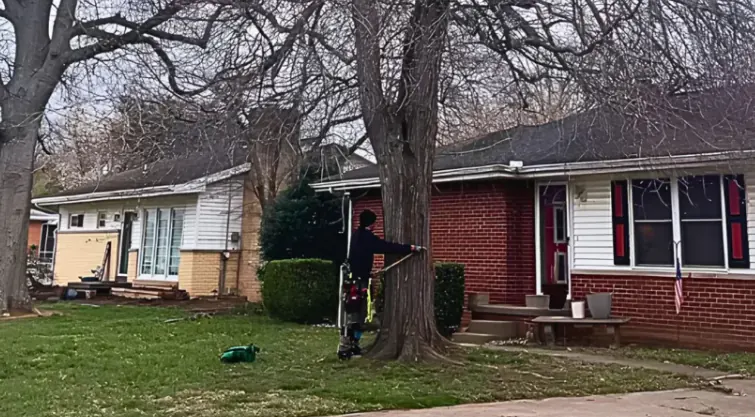
Photograph the entire scene, the damaged tree, its apparent failure point, every affected structure or item, and any temporary repairs. Take wide views for context and close-ups for detail, but never enter a dangerous area to obtain a photograph.
Tree damage insurance photos may help your insurer understand what happened and evaluate the reported loss. Photographs do not determine coverage, prove fault, or guarantee reimbursement. Those decisions belong to your insurer and depend on your policy and the circumstances.
Safety comes before documentation. Stay away from downed power lines, unstable trunks, hanging branches, damaged roofs, gas odors, and partially collapsed structures. A missing photograph is better than an injury.
Tree-B-Gone provides storm-damage and tree services throughout Evansville and surrounding Southwest Indiana communities. If professional work is needed, our team can provide available job photographs, invoices, and documentation of the completed tree work.
What Tree Damage Should You Photograph?
Useful storm-damaged tree documentation shows the complete event, the apparent failure area, and every item affected by the tree. A clear set of wide, medium, and close-up images usually provides more context than several nearly identical close-ups.
Begin from a safe location. Photograph what you can see without walking beneath broken limbs, climbing onto a roof, touching debris, or crossing a restricted area.
The Entire Scene
Wide photographs should show the complete tree, where it came from, where it landed, and what surrounds it. These images help connect the tree to the damaged area in a way that close-ups cannot. FEMA’s guidance on documenting disaster damage with photographs recommends taking several wide-view photographs from multiple angles, followed by close-up photographs of individual damaged components.
Stand at several safe viewpoints if conditions allow. Include the trunk, canopy, ground, affected structure, and nearby property in the frame. A wide image can help show:
- The tree’s original location
- The direction in which the trunk or branch fell
- The distance between the tree and damaged property
- The portion of the building or yard affected
- Nearby trees, structures, vehicles, and access routes
- Debris spread across the property
Do not step into a roadway or neighboring property without permission to improve the angle. Use the safest available position, even if the photograph is not perfect.

The Tree’s Base and Root Area
Photograph the base and surrounding ground if you can do so without approaching an unstable tree. Root and soil images may show observable movement that is not visible in canopy photographs.
Take wide and close views of an exposed or lifted root plate, broken roots, disturbed soil, cracks near the ground, cavities, or visible decay. Include enough surrounding ground to show the size and direction of the affected area.
Do not describe these details as the confirmed cause of failure. A lifted root plate may be visible, but a photograph alone may not establish why the tree moved. Record only what you can observe.
Broken Trunks and Branches
Close-up photographs should show split trunks, torn branch unions, broken limbs, fresh exposed wood, and visible decay revealed by the break. Medium-distance images can then show where each damaged section is located on the tree. The USDA Forest Service research on storm-related tree injury identifies broken branches, split branch forks, and snapped stems as examples of storm injury.
If branches remain suspended, photograph them from outside the possible fall area. Do not stand under the canopy or pull on attached wood to expose the break.
Useful details may include:
- The full length of a trunk split
- Both sides of a torn branch attachment
- Freshly exposed wood at the failure point
- Cavities or deteriorated wood visible after the break
- The position of hanging or lodged branches
- Contact points between the tree and a structure
These photographs document visible conditions, not a professional diagnosis. The cause and structural significance may require an onsite evaluation.
Exterior Property Damage
Photograph every affected exterior surface using both wider views and close-ups. Start with images connecting the tree to the building, then document individual areas of damage. FEMA’s disaster damage documentation guidance provides guidance on documenting overall damage as well as individual damaged components.
Check visible portions of the roofline, shingles, gutters, siding, windows, doors, garage, fence, deck, shed, driveway, landscaping, and outdoor equipment. Do not climb onto the roof or use a ladder near unstable branches.
For each damaged area, take one image showing its location on the property and another showing the detail. If a branch crosses multiple roof sections or damages both a gutter and siding, photograph each affected surface separately.
Natural scale references can make damage easier to understand, but do not place objects inside an unsafe area. A doorway, window, fence panel, or other fixed feature may already provide useful scale.
Interior Property Damage
Photograph interior damage only if the building is safe to enter. Leave immediately if you notice structural movement, exposed wiring, smoke, fire, a gas odor, or significant ceiling collapse. OSHA’s storm recovery and fallen-tree safety guidance highlights hazards associated with storm-damaged trees, electrical hazards, falling materials, and cleanup activities.
Interior documentation may include:
- Ceiling cracks or sagging materials
- Water stains and active water intrusion
- Damaged walls or trim
- Broken windows
- Displaced insulation
- Damaged flooring
- Wet or damaged furniture
- Affected electronics and personal belongings
Take a wide photograph of each room before capturing individual damaged items. If water is entering, document the visible source and spread without touching electrical devices or standing in pooled water.
Vehicles and Other Property
Photograph damaged vehicles, trailers, sheds, play equipment, and other property from several safe angles. Include the tree or branch in at least one image if it can be done without moving debris.
For a vehicle, photograph the entire vehicle, the license plate or another identifying detail, each damaged panel, broken glass, and the point where the tree made contact. Avoid opening doors or moving the vehicle if doing so could shift the tree.
If neighboring property is affected, photograph only from a lawful and safe position. Do not make assumptions about fault or which policy should pay. Ownership, liability, and coverage depend on the facts and applicable insurance policies.
Nearby Hazards
Photograph nearby hazards only from a safe distance. A picture can help document conditions, but no photograph is worth approaching electrical, structural, or tree-failure danger.
Visible hazards may include:
- Downed or damaged utility lines
- A tree leaning toward a building
- Suspended branches
- A blocked driveway or entrance
- Damage near a gas meter
- A broken utility pole
- Other trees with fresh cracks or movement
- Debris restricting emergency access
Treat every downed line as energized. Stay away, keep others back, and contact the utility provider. If there is an immediate threat to life, fire, gas leak, or electrical emergency, leave the area and call 911.
Temporary Repairs and Professional Work
Photograph the original damage before repairs or tree work begin when it is safe to do so. Then document temporary protection, professional removal, cleanup, and the final condition of the property.
Temporary measures may include a roof covering, boarded window, water mitigation, or restricted access area. Take photographs before and after each measure, and keep receipts for purchased materials or hired services.
If urgent work must begin before you can complete your own documentation, do not delay essential stabilization solely to preserve evidence. Ask the contractor what job photographs and written records may be available afterward.
How Should You Take Useful Insurance Photos?
Useful home insurance documentation is clear, organized, and preserved in its original form. You do not need professional camera equipment, but you should follow any specific photo instructions provided by your insurer.
Use these practical steps when conditions are safe:
- Take wide, medium, and close-up images of each area
- Photograph the scene from several safe angles
- Include fixed objects that provide natural scale
- Take a slow video overview of the scene
- Record the date and approximate time
- Photograph labels, serial numbers, and model numbers
- Keep original, unedited image files
- Avoid filters, annotations, and image compression when possible
- Back up photographs in a second location
- Organize files by room, structure, or type of damage
Review the photographs from a safe location before cleanup begins. Check that important details are visible and not obscured by darkness, glare, rain on the lens, or motion blur.
Do not delete extra images simply because they appear repetitive. One photograph may show a detail that is missing from another. Preserve the original files even if you create cropped or labeled copies for easier reference.
File names can help keep a large set organized. Simple descriptions such as “north roof wide,” “garage gutter close,” or “root plate driveway side” are easier to follow than a folder of unidentified numbers.
What Information Should You Record Besides Photographs?
Written notes should record observable facts that photographs may not fully explain. A basic event log can help you connect images, calls, repairs, and expenses without relying on memory later.
Record:
- The date and approximate time of the event
- The weather conditions you personally observed
- When and how the damage was discovered
- What the tree or branch struck
- Any injuries or immediate hazards
- Emergency calls made
- Utility providers contacted
- Contractors contacted
- Temporary repairs or protective measures completed
- Estimates, receipts, and invoices received
- Dates and summaries of insurer communications
- Pre-damage photographs, if available
Avoid guessing why the tree failed. Write “the root plate was lifted” or “the trunk was split near the base” instead of assigning a cause you cannot confirm.
Keep digital and paper records together when possible. Save emails, claim reference information, receipts, estimates, and contractor documents in one folder. If you speak with an insurer, note the date, the representative’s name, and any instructions provided.
Pre-damage photographs may provide additional context. Images from property listings, maintenance records, landscaping projects, or routine family photos may show the earlier condition of the tree or structure.
Should You Wait for the Insurer Before Removing the Tree?
You should contact your insurer as soon as practical, but you should not leave an immediate hazard untouched solely to preserve evidence. Safety, access, active water entry, and the potential for additional property damage may require prompt professional work.
Ask your insurer what documentation it wants and follow the instructions for your policy. Claim procedures differ, so a neighbor’s experience may not reflect your requirements.
If removal or stabilization cannot wait, photograph the original condition from a safe distance first when possible. Keep estimates and invoices, and ask the tree-service provider to document the work performed.
A fallen tree on a house may shift as branches are moved or as damaged building materials settle. Our guide on what to do after a tree falls on your home provides broader safety and response information without replacing your insurer’s instructions.
Professional tree removal in Evansville may be necessary when a tree cannot remain safely in place. Tree removal and insurance coverage are separate decisions. Approval or payment is determined by the insurer.
What Should You Avoid While Documenting Damage?
Avoid any action that exposes you to electrical contact, falling wood, structural collapse, or unexpected tree movement. Remaining outside the danger area is more important than creating a complete photo record.
Do not:
- Approach downed, sagging, or damaged power lines
- Stand beneath hanging or partially attached branches
- Climb onto a damaged roof
- Enter a room with suspected structural, electrical, or gas hazards
- Use a chainsaw on a tree resting against a structure
- Cut branches that are bent, compressed, or under tension
- Pull debris away from a damaged building
- Make temporary repairs that place you in danger
- Move major debris before safe photographs unless immediate safety requires it
- Alter, filter, overwrite, or delete original images
- Present guesses about cause, fault, or responsibility as facts
Keep children, pets, tenants, and visitors away from the affected area. Use a safe boundary rather than standing nearby to warn each person individually.
If a tree blocks an essential exit or creates an immediate threat, contact emergency services or an appropriate professional. Do not attempt to reopen access by cutting or dragging unstable material.
How Can Tree-B-Gone Help Document the Work?
Our team can provide available job photographs, detailed or itemized invoices, and documentation describing the tree work completed. We can also perform emergency tree or limb removal, debris removal, and cleanup when those services are included in the approved quote.
Tree-removal documentation may show the tree’s condition during the work, the removal process, and the completed service. Ask what documentation will be available for your specific project before work begins.
We do not determine insurance coverage, approve claims, or guarantee reimbursement. We also do not bill insurers directly, file claims, manage claim paperwork, or act as an insurance adjuster or public adjuster.
You remain responsible for communicating with your insurance company and submitting the materials it requests. We provide records related to our work, while the insurer evaluates the claim under the applicable policy.
You can read more about how Tree-B-Gone approaches local tree work or view examples in our tree-service work gallery. Our service area information lists Evansville and nearby communities where we provide service.
When Is Emergency Tree Service Necessary?
Emergency tree service may be necessary when a fallen, split, uprooted, or suspended tree creates an active hazard or blocks essential access. The urgency depends on the tree’s position, remaining support, movement, and what it could affect.
Prompt professional attention may be appropriate when:
- A tree is resting on a house, garage, fence, or vehicle
- A split trunk remains partially standing
- A large branch hangs over an occupied area
- A fallen tree blocks a driveway or necessary entrance
- The root plate has lifted
- A tree has shifted or begun leaning after a storm
- Cracking or additional movement is visible
- The tree is close to utility lines
Do not approach a tree involved with a power line. Contact the utility provider and follow its instructions before arranging other work near the electrical hazard.
Tree-B-Gone provides 24/7 emergency tree service for urgent tree and limb hazards throughout Evansville and surrounding areas. Our role is to assess and complete the necessary tree work, not to decide how an insurer will handle the loss.
Frequently Asked Questions About Photographing Tree Damage for Insurance
What tree damage should I photograph for a home insurance claim?
Photograph the complete scene, the tree’s base, the apparent failure point, broken trunks or branches, and every affected structure or item. Include wide views for context and close-ups for visible details.
Document exterior and interior damage only from safe areas. Photographs may support the reported loss, but your insurer determines what documentation is required.
Should I photograph a fallen tree before it is removed?
Yes, photograph the original position before removal if you can do so safely. Capture where the tree came from, where it landed, what it struck, and visible damage.
Do not delay urgent stabilization or removal if the tree presents an immediate danger. Ask the contractor for work photographs and keep all invoices when emergency work must begin quickly.
What if taking photographs is unsafe?
Do not enter the area if photographing the damage would place you near power lines, hanging branches, unstable structures, fire, or gas hazards. Move to a safe location and contact 911, the utility provider, or the appropriate emergency service.
Professional responders or contractors may be able to document conditions during their work. No insurance photograph is worth risking an injury.
Should I take videos as well as photographs?
A slow video overview can provide useful context when recording is safe. Move gradually and describe only observable facts, such as the tree’s location and visible contact points.
Video should supplement clear photographs rather than replace them. Follow your insurer’s instructions for acceptable file types and submission methods.
Can Tree-B-Gone provide job photos for my documentation?
Yes, we can provide available job photographs and documentation of the tree work performed. We can also provide a detailed or itemized invoice for the approved service.
Tell us that documentation is needed when arranging the work. Your insurance company will decide how it uses the materials.
Does Tree-B-Gone file insurance claims for customers?
No, we do not file or manage homeowners insurance claims. We do not bill insurance companies directly or act as an insurance adjuster.
We provide documentation related to our tree work that you can submit to your insurer. You are responsible for following your policy’s claim process.
Will home insurance pay for tree removal?
Coverage varies by policy, cause of loss, property damage, and the circumstances surrounding the tree. Photographs and contractor documentation do not guarantee that removal costs will be reimbursed.
Contact your insurer for a decision based on your policy. Do not rely on general information as confirmation that a particular loss is covered.
Contact Tree-B-Gone for Storm-Damaged Tree Work in Evansville
Contact our team if a fallen, split, uprooted, or storm-damaged tree requires professional attention. We can assess the tree work, complete the quoted service, and provide available photographs and documentation related to our work.
Call (812) 714-1217 or contact Tree-B-Gone to request assistance. If the tree is touching a power line or another immediate electrical hazard exists, stay away and contact the utility provider first.